


In this article, we shall try to get a basic idea of how we can use GraphQL queries to fetch the required data, instead of using the traditional REST API approach. We shall be doing so by performing the basic CRUD operations with Node.js at the server-side. This is not a detailed course on GraphQL, it is more of an introductory course to GraphQL, which would be sufficient for you to begin working with GraphQL queries. Alright then, without any further adieu, let’s begin with it. Let us first understand what GraphQL actually is & why do we need to use it.
GraphQL is a modern way of building & querying APIs.
It was developed by Facebook & released publicly in 2015.
It is generally used to load the data from a server to the client-side.
Aggregation of data from multiple sources has been made quite easy by GraphQL.
It uses a type system to describe the data required.
Now, the bigger question is Why do we need GraphQL? GraphQL lets the user make a single call to fetch the required information rather than constructing several REST requests to fetch the same data. Bigwigs like Facebook, Twitter, Instagram use GraphQL in their tech stack for querying the data.
CRUD Application
Now, let’s move on to the intended section of this article. We shall be writing queries to fetch, create, update & delete data. Before that, let’s create a basic Node.js server file that looks like this -
**const express = require('express');**

const schema = require('./schema');

const expressGraphQL = require('express-graphql');

const PORT = 4000;

const app = express();


app.use('/graphql', expressGraphQL({

    schema: schema,

    graphiql: true

}));


app.listen(PORT, () => {

    console.log(`Server running at PORT : ${PORT}`);

});
Here, we are -
Initializing our server at PORT 4000.
Using package called express-graphql (Used to create a GraphQL HTTP server with any HTTP web framework that supports connect styled middleware, for example, Express.js in our case)
Setting up the schema (This is where we shall be writing all our queries).
Setting up graphql as true, that lets us use the GraphQL IDE.
Talking about the GraphQl IDE, it is an in-browser tool for writing, validating, and testing the GraphQL queries. To access the GraphQL IDE, you can start the server using “nodemon server.js” and then visit http://localhost:4000/graphql. You will see a window like this -
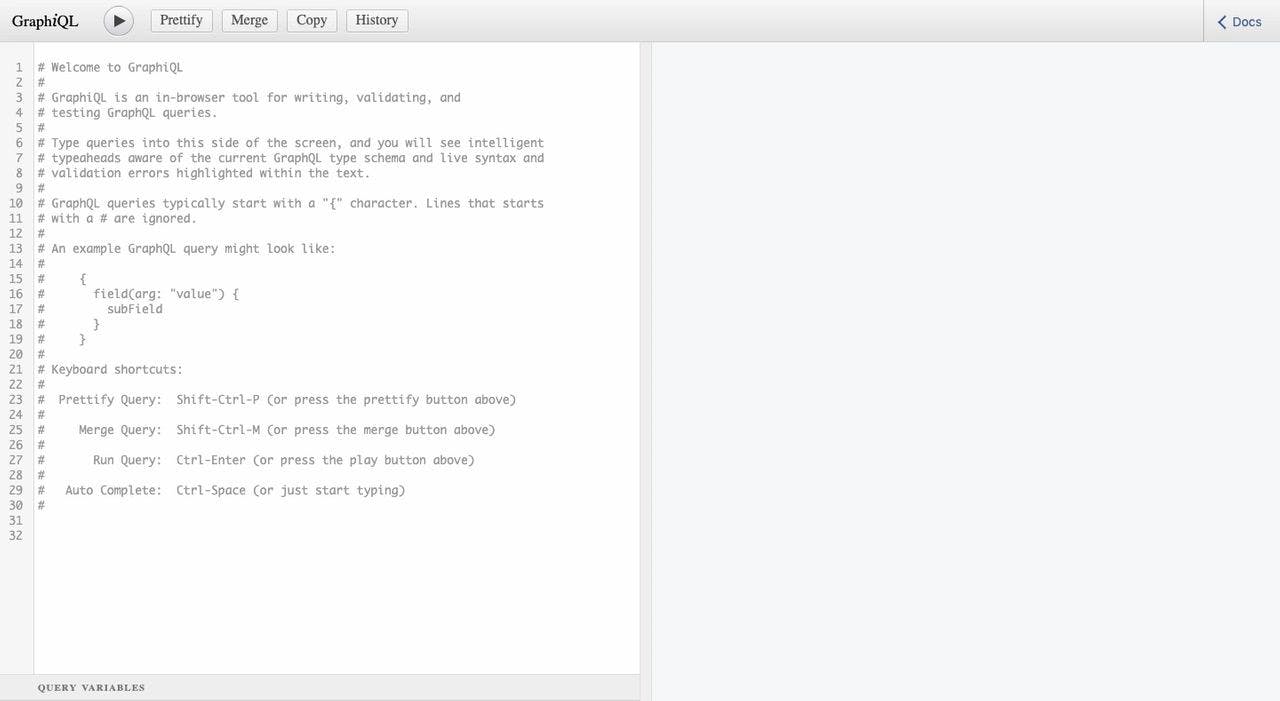
The left part of the IDE (where welcome message & introductions are written) is where we shall be writing the GraphQL queries. The right side of the IDE (the blank grey space) is where we shall see the responses relevant to the queries. So, before we start writing queries, let’s import some necessary stuff in our schema.js file.
**// Object types fo queries
const {

    GraphQLNonNull,

    GraphQLString,

    GraphQLList,

    GraphQLSchema,

    GraphQLObjectType

} = require('graphql');**
Here, we are importing the Object types that would be used for the relevant data types in the queries we shall be writing. For example, for integer values, we can use GraphQLInteger & for string values, we can use GraphQLString. Now, we shall be using a public REST API jsonplaceholder, using which we shall write GraphQL queries to perform CRUD operations related to posts. For the sake of simplicity, we shall be using the id, title & body attributes from the API response. Now that we know our datatypes, we can define the field types to be used for our GraphQL queries, like so -
**// Object types fo queries
const {

    GraphQLNonNull,

    GraphQLString,

    GraphQLList,

    GraphQLSchema,

    GraphQLObjectType

} = require('graphql');
**

// Posts Type
const PostsType = new GraphQLObjectType({

    name: "Posts",

    fields: () => ({

        id: { type: GraphQLString },

        title: { type: GraphQLString },

        body: { type: GraphQLString }

    })

})
Here, we are using GraphQLString type for all the three attributes, that is, id, title & body. Now, we shall be writing a root query, which would act like a base for all other queries.
**// Object types fo queries
const {

    GraphQLNonNull,

    GraphQLString,

    GraphQLList,

    GraphQLSchema,

    GraphQLObjectType

} = require('graphql');
**

// Posts Type
const PostsType = new GraphQLObjectType({

    name: "Posts",

    fields: () => ({

        id: { type: GraphQLString },

        title: { type: GraphQLString },

        body: { type: GraphQLString }

    })

})


// Root Query
const RootQuery = new GraphQLObjectType({

    name: "RootQueryType",

    fields: {

    }

});


module.exports = new GraphQLSchema({

    query: RootQuery

})
As you can see that, we’ve written a root query (line number 21), and here we can set the fields. Inside fields, we can write all the queries we want. Let’s begin writing all the queries -
- GraphQL query to fetch all posts
**// Root Query
const RootQuery = new GraphQLObjectType({

    name: "RootQueryType",

    fields: {**

        // To fetch all posts
        posts: {

            type: new GraphQLList(PostsType),

            resolve() {

                return axios

                    .get('https://jsonplaceholder.typicode.com/posts')

                    .then((res) => res.data);

            }

        }

    }

});
The first query we’re writing down is that of fetching all the posts. Inside the fields, the query has been name posts, the type has been set to PostsType (the one, where we have set up object types for the attributes we will use). Next, we’re using resolve function, in which we are using axios to make call to the desired endpoint, following which, we’re simply just returning the response data. Now, to see its action in working, we can open GraphQL IDE (localhost:4000/graphql), and start using our first GraphQL query to retrieve all the posts.
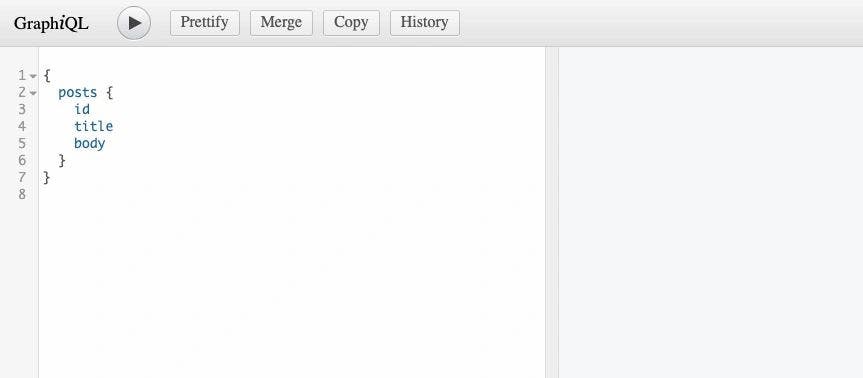
Here, we’re firstly using parantheses to start writing a query, then, we’re using the name of query we need to use (remember, we wrote posts as the name of our first query earlier?). After that, we need to define what all attributes we need to fetch from the API response. For now, we are using all the three attributes. You can try the same, and play around with removing any one these. After writing this, we need to hit the play icon that sits right to the GraphQL text at top left corner.

After we hit this, we receive the desired response at the right side of IDE, like so -
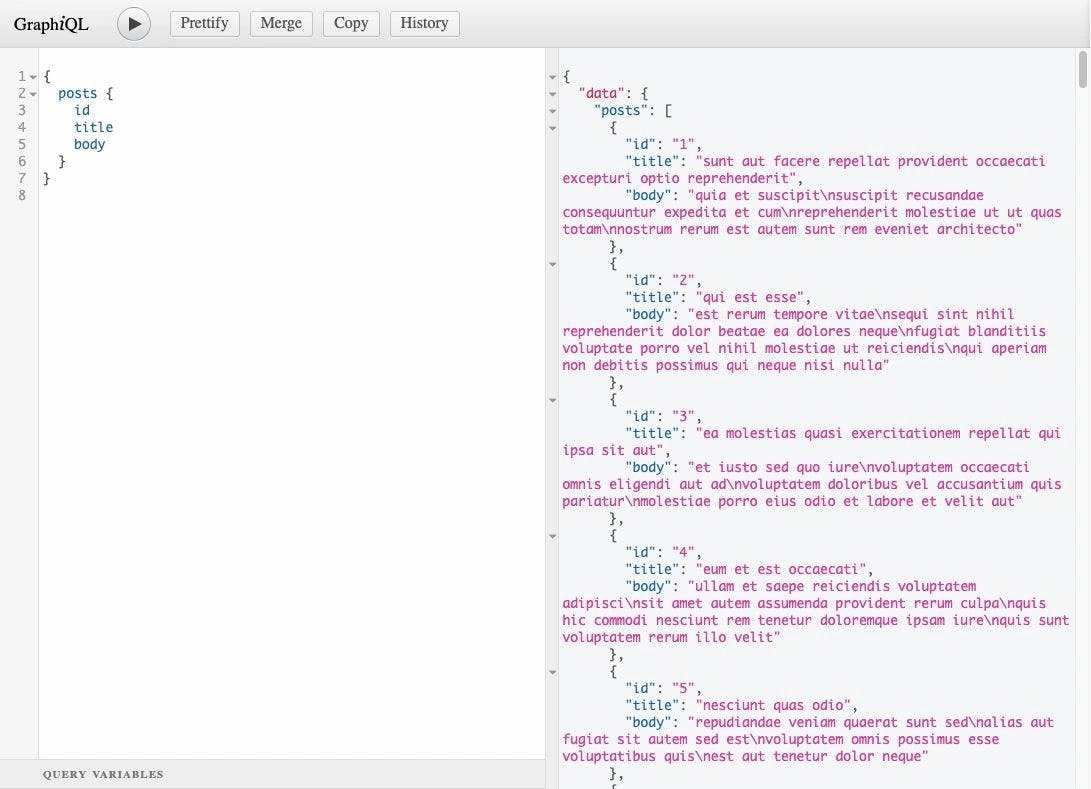
See this? Well, we’ve just written & executed our first GraphQl query. It wasn’t as hard as you must’ve assumed it to be? Right? Alright then, in the same way, we can write another query to retrieve a particular post using its Id.
**// Root Query
const RootQuery = new GraphQLObjectType({

    name: "RootQueryType",

    fields: {**

        // To fetch all posts
        posts: {

            type: new GraphQLList(PostsType),

            resolve() {

                return axios

                    .get('https://jsonplaceholder.typicode.com/posts')

                    .then((res) => res.data);

            }

        },

        // To fetch post using ID
        post: {

            type: PostsType,

            args: {

                id: { type: GraphQLString }

            },

            resolve(parentValue, args) {

                return axios

                    .get(`https://jsonplaceholder.typicode.com/posts/${args.id}`)

                    .then((res) => res.data);

            }

        }

    }

});
To fetch a post using its id, we can write the post query. The only difference between the posts query and post query is that, in order to use the id, we have to first define it in the args (after type), and also, we need to write args as argument inside the resolve function. From args, we can fetch the id (as requested from the client-side or GraphQL IDE in this case) and use it in the endpoint to fetch a particular post. Now, we can turn back to the GraphQL IDE & test this query.
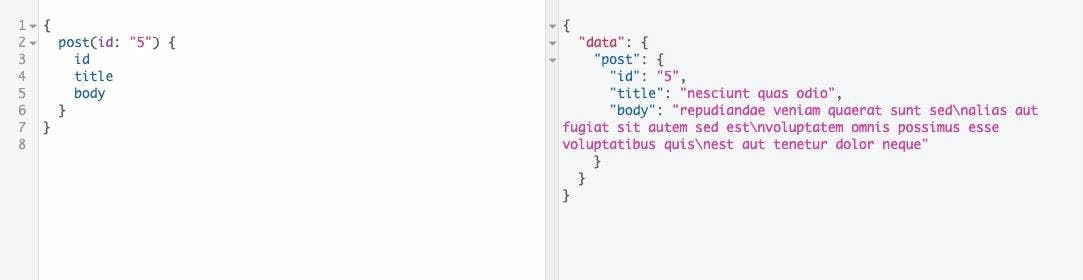
Here, we are using post query and putting in the id that we want. Remember, we have defined GraphQLString type for id? That’s the reason, we are setting the id as a string here. Like we did in the posts query, we can set the values we want like id, title & body and hit (Ctrl + Enter). You should see the response with the post associated to the requested id. Now, before we proceed further to understand the mutations, I’d suggest you to take some time in absorbing the things we’ve done by playing around with 2 queries we’ve written so far.
Mutations
Now, in order to make changes to the server side data, we can use mutations in GraphQL. Mutations are used to modify the server side data. These are very simple to use & are quite similar to the Queries. Let’s start with the mutations part -
**// Mutations
const Mutation = new GraphQLObjectType({

    name: "Mutation",

    fields: {**

    }

});


module.exports = new GraphQLSchema({

    query: RootQuery,

    mutation

});
See? This is quite similar to what we did while writing the queries. Inside the fields, we can write all the queries to mutate the server side data. Alright so, let’s begin -
- Creating a new post
To add a new post, we can begin with writing a addPost query like so -
**// Mutations
const Mutation = new GraphQLObjectType({

    name: "Mutation",

    fields: {**

        // To add a new post
        addPost: {

            type: PostsType,

            args: {

                title: { type: new GraphQLNonNull(GraphQLString) },

                body: { type: new GraphQLNonNull(GraphQLString) }

            },

            resolve(parentValue, args) {

                return axios

                    .post('https://jsonplaceholder.typicode.com/posts', {

                        title: args.title,

                        body: args.body

                    })

                    .then((res) => res.data);

            }

        }

    }

});
Here, we’re setting the PostsType, like we did in the previous queries, In args, we’re using GraphQLNonNull to set title and body as required input fields (id is being auto generated at the server side). Now, we can go to the GraphQL IDE and try creating a new post.
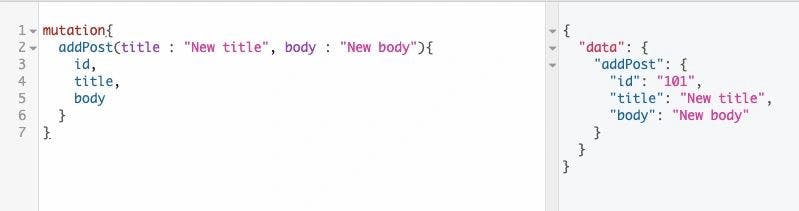
We’re beginning off with writing mutation first, following which, we are using the addPost query. Here, we need to define a title & body (like we used id while retrieving a particular post) and mention what data we need from the response. After hitting (Ctrl + Enter), you can see that, we’ve successfully added a new post that shows all the required data values we asked for. Now, similarly, we can write queries for updating & deleting a post. For deleting, we are using query name deletePost and for editing, we are using editPost. Rest, everything is exactly similar to queries we have written so far.
- Deleting a post
**// Mutations
const Mutation = new GraphQLObjectType({

    name: "Mutation",

    fields: {**

        // To delete a post
        deletePost: {

            type: PostsType,

            args: {

                id: { type: new GraphQLNonNull(GraphQLString) }

            },

            resolve(parentValue, args) {

                return axios

                    .delete(`https://jsonplaceholder.typicode.com/posts/${args.id}`)

                    .then((res) => res.data);

            }

        }

    }

});
- Updating a post
**// Mutations
const Mutation = new GraphQLObjectType({

    name: "Mutation",

    fields: {**

        // To edit a post
        editPost: {

            type: PostsType,

            args: {

                id: { type: GraphQLNonNull(GraphQLString) },

                title: { type: GraphQLNonNull(GraphQLString) },

                body: { type: GraphQLNonNull(GraphQLString) },

            },

            resolve(parentValue, args) {

                return axios

                    .put(`https://jsonplaceholder.typicode.com/posts/${args.id}`, {

                        title: args.title,

                        body: args.body

                    })

                    .then((res) => res.data);

            }

        }

    }

});
Easy right? So, this is the way you begin your journey with GraphQL. I know these are very basic queries, but these queries will help you get started. To get to a bit of an advanced tutorial, visit this article. Here, we shall be creating a very basic CRUD application with GraphQL. If you feel you’ve gained something from this article & such simplified articles should keep coming, kindly consider supporting me by donating at paypal.me/topcoded. If you’ve any feedback, kindly let me know in the comments section. You can also tell if you want me to cover some other area for the article. To get the complete code of the above project, you can check my github repo here. I’ll see you in the next one. :)